If you have experience with Python or have been reading documentation related to the programming language, you may have come across the term cURL. Using cURL with Python is a method to transfer data through various internet protocols. This article will walk you through he different ways to use cURL with Python and how to write a script to implement it.

How to Use cURL with Python: 3 Ways
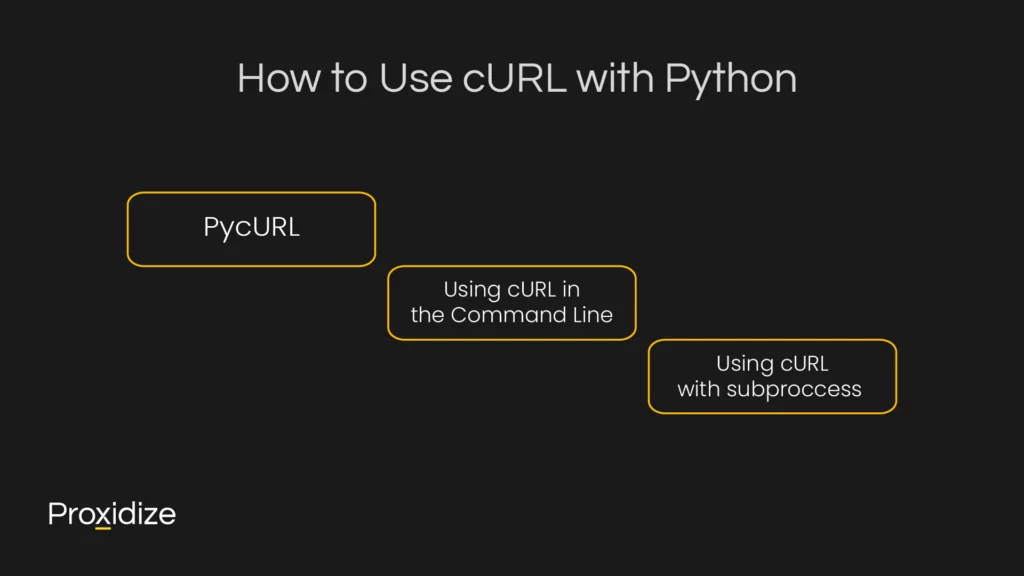
There are three ways that someone can use cURL with Python: Simulating cURL requests in the command line, using the PycURL package, using the subprocess module. Using the PycURL library is the more common way users utilize cURL and fits closely with how other libraries are used with Python. cURL requests can be simulated in the command line via the OS and subprocess Python packages. It is a straightforward way to programmatically send commands to the command-line interface of the operating system. When using subprocesses, it allows the execution of external commands from within Python scripts, making the whole process more straightforward and efficient. We will be covering all three methods and providing the necessary script examples for them.
IP rotation, city and carrier targeting,
sticky sessions — control it all via API
PycURL
To start using the PycURL library, you must install it through your terminal by using this command:
pip install pycurlGET and POST Requests
Before we get into how to write the full script, let’s go over what GET and POST requests are and how they can be useful when using cURL with Python.
GET is a common request type that is used during regular internet behaviors. When entering a website, you are sending a GET request. The page might send even more GET requests to accommodate images, stylesheets, and any other elements it needs to load in. For the purposes of this article, we will be using the website https://httpbin.org, it is a website commonly used to test out HTTP requests. It also returns data in JSON and includes all the headers, data, form, and files that are found within the request. For the GET example, we will be using https://httpbin.org/get as it will accept GET requests. The script to implement a GET request will go as follows:
import pycurl
from io import BytesIO

buffer = BytesIO()
c = pycurl.Curl()
c.setopt(c.URL, 'https://httpbin.org/get')
c.setopt(c.WRITEDATA, buffer)
c.perform()
c.close()

body = buffer.getvalue()
print(body.decode('utf-8'))POST requests, on the other hand, send data to a server to create or update a resource. For the POST requests, we will be using the website https://httpbin.org/post. The code to execute a POST request with PycURL is as follows:
import pycurl
from io import BytesIO

data = {"field1": "value1", "field2": "value2"}
post_data = "&".join([f"{k}={v}" for k, v in data.items()])
buffer = BytesIO()

c = pycurl.Curl()
c.setopt(c.URL, "https://httpbin.org/post")
c.setopt(c.POSTFIELDS, post_data)
c.setopt(c.WRITEDATA, buffer)
c.perform()
c.close()

response = buffer.getvalue()
print(response.decode("utf-8"))In this instance, we create a dictionary with the data that needs to be sent before converting it to a query string and setting the POSTFIELDS option for the prepared data.
Making Requests with PycURL
PycURL allows you to perform network operations with ease and offers control over HTTP requests, headers, and cookies. Once you have the library installed into your IDE, you are ready to go. We will now show you what a simple script will look like when using cURL with Python, along with an explanation of the script and its functions.
import pycurl
from io import BytesIO

# Create a buffer to store the response
buffer = BytesIO()

# Initialize a PycURL object
curl = pycurl.Curl()
curl.setopt(curl.URL, 'https://httpbin.org/get')  # Set URL to request data from
curl.setopt(curl.WRITEDATA, buffer)  # Specify buffer to store the output

# Perform the request
curl.perform()

# Get the HTTP response code
http_code = curl.getinfo(pycurl.RESPONSE_CODE)

# Close the curl object
curl.close()

# Decode the response and print it
body = buffer.getvalue().decode('utf-8')
print(f'HTTP Response Code: {http_code}')
print(f'Response Body:\n{body}')Code Explanation:
- Imports: The BytesIO object will act as a buffer to store the response body from requests
- Setting up cURL object: The Pycurl object is the core interface handling requests. There are two ways it does this. The curl.setopt(curl.URL) sets the URL for the request and the curl.setopt(curl.WRITEDATA) will specify the buffer to store the response data.
- Performing the Request: curl.perform executes the request.
- Fetching the HTTP Response Code: Retrieves the status code for the request.
- Close the Connects: Frees up resources.
- Printing the Response: Decodes and prints the response.
Additionally, you can add headers, handle cookies, and perform POST requests by setting additional options with setopt.
curl.setopt(curl.HTTPHEADER, ['User-Agent: CustomUserAgent'])
curl.setopt(curl.POSTFIELDS, 'param1=value1¶m2=value2')The full code with the optional steps will look something like this:
import pycurl
from io import BytesIO

buffer = BytesIO()
curl = pycurl.Curl()

curl.setopt(curl.URL, 'https://httpbin.org/get')
custom_headers = [
    'User-Agent: CustomUserAgent/1.0',
    'Accept: application/json'
]
curl.setopt(curl.HTTPHEADER, custom_headers)
curl.setopt(curl.TIMEOUT, 10)
curl.setopt(curl.CONNECTTIMEOUT, 5)
curl.setopt(curl.FOLLOWLOCATION, True)
curl.setopt(curl.MAXREDIRS, 5)
curl.setopt(curl.WRITEDATA, buffer)

cookie_file = 'cookies.txt'
curl.setopt(curl.COOKIEFILE, cookie_file)
curl.setopt(curl.COOKIEJAR, cookie_file)

try:
    curl.perform()
    http_code = curl.getinfo(pycurl.RESPONSE_CODE)
    total_time = curl.getinfo(pycurl.TOTAL_TIME)
    body = buffer.getvalue().decode('utf-8')
    print(f'HTTP Response Code: {http_code}')
    print(f'Total Time: {total_time:.2f} seconds')
    print(f'Response Body:\n{body}')
finally:
curl.close()Using cURL in the Command Line
Using cURL directly from the command line is a great option if you need to perform a quick and simple HTTP request without having to write extensive code or integrate more complex libraries. It allows you to test web endpoints, simulate different types of requests, or inspect responses directly in the terminal. The versatility of using cURL in the command line is especially valuable for scripting repetitive tasks like downloading files, submitting form data, or interacting with APIs in web automation.
It is similarly beneficial in environments where installing or using libraries such as libcurl-based packages becomes a challenge, such as lightweight Docker containers, restricted development systems, or headless servers. As a command-line utility, it can run with minimal dependencies as it provides a reliable way to perform network requests in environments. This makes it a great solution for system administrators, DevOps engineers, and developers who need reliable HTTP functionality without any additional setup.
The first step you would need to do is to open the command line and execute this:
curl https://httpbin.org/The response from the website’s server is printed directly into the command line. It prints the HTML of the httpbin page as text. There are options to configure the response and get specific information. To get the header, send out the request with the -I or –head option. The command will look like this:
curl -I https://httpbin.org/getThe response will be much shorter and contain data such as the date and time of the request as well as any information about cookies. If you wish to use cURL to download data, simply add the -o or -O option. This will define where to save a specific result.
Using cURL with subproccess
Another method of using Python with cURL is to utilize the subprocess module. This allows the execution of external commands from within Python scripts. The subprocess module is mainly used to execute and interact with system commands or external programs directly from the script. This offers a way to integrate powerful command-line tools, automate tasks, or interact with non-Python programs. It is useful for quick execution of shell commands, running external scripts, managing system processes, and orchestrating complex workflows that involve CLI utilities. By controlling the input, output, and error streams, the subprocess enables seamless communication and automation for tasks that might be troubling to implement in Python. Here is an example script of how you could use the subprocess.
import subprocess

# Example: Fetching data using cURL
response = subprocess.run(
    ["curl", "-s", "https://httpbin.org/get"],
    capture_output=True,
    text=True
)

# Print the output
print(response.stdout)The -s flag tells cURL to run in silent mode (it hides progress), while the capture_output=True and text=True flags allow you to capture and decode the output as a string.
Conclusion
Using cURL with Python offers a unique way of interacting with web services, transferring data, and automating complex workflows. Whether you choose to use PycURL, call cURL commands, or take advantage of the subprocess module, each method is guaranteed to provide a unique advantage. PycURL integrates smoothly with Python scripts for more control over HTTP requests while cURL in the command line or through subprocess is ideal for quick tests, automation, or leveraging existing CLI utilities. With these tools, you can enhance your ability to handle HTTP operations efficiently and tackle tasks from web scraping to data transfer to API interactions and debugging in simple environments.


