Scrapy Playwright is a library that adds JavaScript rendering to Scrapy. It allows users to instruct a headless browser to scrape dynamic web pages and simulate human behavior to reduce getting spiders blocked. Scrapy is used as a web scraping library with comprehensive architecture support for common web scraping processes. Despite its power, it does lack JavaScript rendering. This is where Playwright comes in. This tutorial will explain how to set up and install Scrapy Playwright and how and why to use proxies with your setup.
What is Scrapy Playwright?
Scrapy Playwright is an integration between Scrapy and Playwright. It allows users to scrape dynamic web pages with Scrapy by processing the web scraping requests using a Playwright instance. It also enables most of Playwright’s features including simulating mouse and keyboard actions, waiting for events, load states, and HTML elements, taking screenshots, and executing custom JavaScript code.
Playwright.js is a recent addition to the programming world as it was released by Microsoft in 2020 and is quickly becoming a popular headless browser library for browser automation and web scraping. This is in part due to its cross-browser support and developer experience improvements over Puppeteer.
Scrapy is a fast and powerful Python web scraping framework that can be used to efficiently crawl websites and scrape their data. We had previously written a guide showing how to use Scrapy in Python. However, using Scrapy is often more complex when compared to other scraping libraries such as BeautifulSoup. If you wish to use a headless browser, you will need to install additional dependencies and configure settings parameters.
Websites that rely on JavaScript to render their content need a tool that can handle the dynamic content, which is where Playwright comes in. It is an open-source automation library that is great for end-to-end testing and can perform web scraping. By combining both tools, Scrapy Playwright can assist with carrying out complex web scraping tasks. Some users choose to implement Scrapy Splash to handle JavaScript-heavy websites but Playwright remains a widely adopted tool for many Scrapy users thanks to its powerful features and extensive documentation.

Installing Scrapy Playwright
The first thing you would need to do before you write a Scrapy Playwright script is to install all the necessary libraries. We will be installing a few Python libraries:
- Scrapy for creating a Scrapy project and executing the scraping spiders.
- Scrapy-playwright for processing the requests using Playwright.
- Playwright which is the API for automating the headless browsers.
Scrapy Playwright is written in Python so the first step is to ensure you have the latest version downloaded. In your terminal, enter the following prompt:
python –-versionCheck the official Python website to ensure you have the latest version. As of the writing of this article, that version is 3.13.1
Once that is done, you must create a scrapy-playwright-project folder in your Python virtual environment. This can be done with the following command written in your terminal:
mkdir scrapy-playwright-project
cd scrapy-playwright-project
python3 -m venv env
This will create a folder within your primary folder where everything will be placed. After that, install Scrapy. This might take a minute or so to initiate.
pip3 install scrapyOnce Scrapy has been installed in your environment, you need to open a Scrapy file. This can be done with the following command:
scrapy startproject playwright_scraperThe scrapy-playwright-project file will now have the Scrapy files loaded into it. This includes the init, items, middlewares, pipelines, settings, and spiders files.
The next step you need to follow is to install the Scrapy Playwright library onto your virtual environment terminal. To do this, you must run the following command. Once this is done, Playwright will be added as part of your project dependencies by default.
pip3 install scrapy-playwrightFinally, complete the Playwright configuration with the Chromium system dependencies by using this command in your terminal:
playwright install chromiumIf you wish to use a non-Chromium based browser, simply replace chromium with the name of your target browser engine. For the purposes of this guide, we will be using chromium.
Setting Up Scrapy Playwright
Before we start writing out the script, there is one more step you must follow; setting up Scrapy Playwright within your environment. The previous steps are there to introduce the necessary libraries needed for the script to work, this step is the start of your web scraping project.
Open the settings.py file that was created during the “scrapy startproject playwright_scraper” command. It should be located in your directory under the playwright_scraper file. Add the following lines to configure ScrapyPlaywrightDownloadHandler as the default http/https handler. This will allow Scrapy to perform HTTP or HTTPs requests through Playwright.
DOWNLOAD_HANDLERS = {
        "http": "scrapy_playwright.handler.ScrapyPlaywrightDownloadHandler",
        "https": "scrapy_playwright.handler.ScrapyPlaywrightDownloadHandler",
	}
After you enter that within the bottom of the settings.py script, you will need to enable the asyncio-based Twisted reactor. However, most recent versions of Playwright should already have it in the document so ensure it is there before placing it.
TWISTED_REACTOR = "twisted.internet.asyncioreactor.AsyncioSelectorReactor"By default, Playwright will operate in headless mode. If you do wish to see your actions performed, add this value to the settings.py script:
PLAYWRIGHT_LAUNCH_OPTIONS = {
        "headless": False,
	}
Chrome will initiate in headed mode with the UI. You must keep in mind that the browser will not show up on WSL as it is just bash and not a GUI desktop.
Writing the Scrapy Python Script
For this Scrapy Playwright example, we will be using this URL from the ScrapingClub exercise. It loads dynamic content which loads more products as you scroll. The first thing you need to do is enter the following command in your terminal:
scrapy genspider scraping_club https://scrapingclub.com/exercise/list_infinite_scroll/Doing this will create a new Scrapy spider called “scraping_club.py”. This is where we will be writing the script. Once you open the file, you should see this initial script:
import scrapy

    class ScrapingClubSpider(scrapy.Spider):
        name = "scraping_club"
        allowed_domains = ["scrapingclub.com"]
        start_urls = ["https://scrapingclub.com/exercise/list_infinite_scroll/"]

        def parse(self, response):
            pass
In order to open the page in Chrome through Playwright, rather than making an HTTP GET request for the first page the spider should visit, implement the start_requests() method instead of specifying the starting URL in start_urls. This should look something like this:
def start_requests(self):
        url = "https://scrapingclub.com/exercise/list_infinite_scroll/"
        yield scrapy.Request(url, meta={"playwright": True})
The meta={“playwright”: True} argument will tell Scrapy to route the request through Scrapy Playwright. Since start_requests() replaces start_urls, you can remove the attribute from the class. This is what the complete code of your new spider should look like:
import scrapy

    class ScrapingClubSpider(scrapy.Spider):
        name = "scraping_club"
        allowed_domains = ["scrapingclub.com"]

        def start_requests(self):
            url = "https://scrapingclub.com/exercise/list_infinite_scroll/"
            yield scrapy.Request(url, meta={"playwright": True})

        def parse(self, response):
            # scraping logic...
            pass
Next up, you need to implement the scraping logic in the parse() method. Open the website in your browser and inspect a product HTML mode with DevTools to define a data extraction strategy. For this example, we have chosen a snippet that selects all product HTML elements with the css() function to employ CSS selectors. Then, it will iterate over them to extract their data and use yield to create a new set of scraped items.
def parse(self, response):
        # iterate over the product elements
        for product in response.css(".post"):
            # scrape product data
            url = product.css("a").attrib["href"]
            image = product.css(".card-img-top").attrib["src"]
            name = product.css("h4 a::text").get()
            price = product.css("h5::text").get()

            # add the data to the list of scraped items
            yield {
                "url": url,
                "image": image,
                "name": name,
                "price": price
            }
The full script should look like this:
import scrapy

class ScrapingClubSpider(scrapy.Spider):
    name = "scraping_club"
    allowed_domains = ["scrapingclub.com"]

    def start_requests(self):
        url = "https://scrapingclub.com/exercise/list_infinite_scroll/"
        yield scrapy.Request(url, meta={"playwright": True})

    def parse(self, response):
        # iterate over the product elements
        for product in response.css(".post"):
            # scrape product data
            url = product.css("a").attrib["href"]
            image = product.css(".card-img-top").attrib["src"]
            name = product.css("h4 a::text").get()
            price = product.css("h5::text").get()

            # add the data to the list of scraped items
            yield {
                "url": url,
                "image": image,
                "name": name,
                "price": price
            }
Using Proxies with Scrapy Playwright
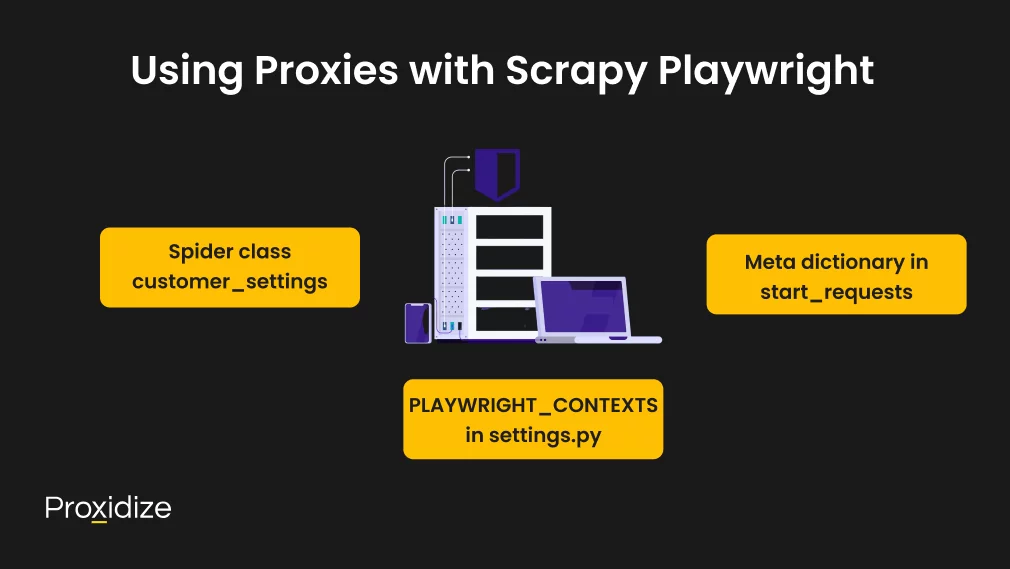
One of the biggest challenges when it comes to scraping data from the web is getting blocked by anti-scraping measures like rate limiting and IP bans. One of the most effective ways to avoid bot detection is to use a proxy server. Once you have taken your choice of either a residential proxy, a datacenter proxy, or a mobile proxy, follow these steps to implement a proxy within your Scrapy Playwright script. There are three ways you can set up proxies for your Scrapy Playwright script.
Spider Class customer_settings
You can add the proxy settings as launch options within the custom_settings parameter used by the Scrapy Spider class:
custom_settings = {
   	"PLAYWRIGHT_LAUNCH_OPTIONS": {
       	"proxy": {
           	"server": "X",
           	"username": "username",
           	"password": "password",
       	},
   	}
   }
Meta dictionary in start_requests
You can define the proxy within the start_requests function by passing it within the meta dictionary as such:
def start_requests(self) -> Generator[scrapy.Request, None, None]:
   	yield scrapy.Request(
       	url,
       	meta=dict(
               playwright=True,
               playwright_include_page=True,
           	playwright_context_kwargs={
               	"proxy": {
                       "server": "X",
                       "username": "username",
                       "password": "password",
               	},
           	},
       	    errback=self.errback,
       	),
   	)
PLAYWRIGHT_CONTEXTS in settings.py
Finally, you can define the proxy you want to use within the Scrapy settings file:
PLAYWRIGHT_CONTEXTS = {
   "default": {
   	"proxy": {
       	"server": "X",
       	"username": "username",
       	"password": "password",
   	},
   },
   "alternative": {
   	"proxy": {
       	"server": "X",
       	"username": "username",
       	"password": "password",
   	},
   },
Conclusion
Scrapy Playwright is a useful integration that enhances Scrapy’s capabilities by enabling JavaScript rendering. This allows web scrapers to extract content from dynamic websites that rely on JavaScript to display information. While setting up Scrapy Playwright needs additional dependencies and configuration, it provides significant advantages such as simulating human interactions and handling complex web pages.
Key Takeaways:
- Scrapy Playwright enables JavaScript rendering for Scrapy spiders which makes it useful for scraping dynamic pages.
- Installation requires more than just installing Scrapy and Playwright and configuring browser engines.
- Proxies can help circumvent blocking when scaping JavaScript-heavy websites and there are three unique ways to integrate them into Scrapy Playwright.
- Proper request handling is vital as playwright operates asynchronously and so additional wait conditions may be needed for complete data extraction.
- Scrapy Playwright is powerful but complex and needs more configuration than simpler libraries like BeautifulSoup or Selenium.
Using proxies with Scrapy Playwright is crucial to avoid detection and overcome anti-scraping measures. By combining the efficiency of Scrapy with the flexibility of Playwright, developers can create more resilient and scalable web scrapers. With proper implementation such as handling asynchronous behavior and defining wait conditions, you can maximize the effectiveness of your scraping project.
Frequently Asked Questions
How can I manage multiple browser contexts in a Scrapy project using Playwright?
In Scrapy Playwright, you can define multiple browser contexts to simulate different browser sessions in a single Scrapy spider. This is useful for handling situations such as logging in with different credentials or maintaining separate sessions. You can specify these contexts in your Scrapy settings and reference them in your requests.
What is the role of the async def keyword in Scrapy Playwright spiders?
The async def keyword is typically used to define asynchronous functions in Python. In the context of Scrapy Playwright, asynchronous functions allow for non-blocking execution of tasks, enabling the spider to handle multiple I/O-bound operations at the same time. This is useful when dealing with dynamic websites that require waiting for JavaScript-rendered content to load.
How does the Scrapy Download Handler integrate with Playwright to handle dynamic content?
The Scrapy Download Handler is responsible for fetching web pages. When used with Playwright, it can render JavaScript-heavy websites by controlling a headless browser. This allows Scrapy to retrieve fully rendered HTML content including dynamic elements that are not present in the initial page load.
What are some best practices for using mobile proxies to avoid anti-scraping measures in Scrapy Playwright?
To effectively use mobile proxies in Scrapy Playwright and mitigate anti-scraping measures, make sure you rotate proxies regularly to distribute requests across different IP addresses, use random delays between requests to mimic human browsing behavior, use realistic user-agent headers and other HTTP headers to avoid detection, and monitor proxy performance and health to ensure reliability.
How can I handle browser interactions, such as clicking and scrolling, in a Scrapy spider using Playwright?
In Scrapy Playwright, you can perform browser interactions by utilizing Playwright’s API within your spider. You can instruct the headless browser to click buttons, fill out forms, or scroll through pages to load additional content. These interactions can be defined in the playwright_page_methods parameter within the meta dictionary of your Scrapy request.
