An IP ban can be incredibly frustrating. As is losing complete access to the website that’s banned you. Unfortunately it’s all too common in web automation. As websites and the antibot technologies they use continue to become more sophisticated, as web scrapers — anyone in web automation — you have to come up with more and more creative ways to avoid being banned.
What do you do when despite your best efforts you’ve been slapped with an IP ban? In this article, we’ll explore what an IP ban is, how to bypass IP ban restrictions and the reasons websites IP ban users. We’ll include a guide on how to get a new IP and what steps to take if a new IP alone isn’t enough.
What is an IP Ban?
An IP ban relates to a practice websites use to block an IP address. Once the IP address becomes banned, the website blocks any request originating from that IP, preventing them from viewing the content available on the site.
If a website administrator or an automated blocking system notices improper activity coming from a user; anything from harassing people, breaking the terms of service, or performing an action that threatens the safety and stability of a website, an IP ban will be initiated to put a stop to it. Once the ban is in place, any traffic coming from that address will be blocked, preventing the user from seeing or interacting with the website.
An IP ban is generally the final step in a series of escalations to punish a misbehaving user. By blocking the IP address entirely, the user is forced out of the website completely. The only way to regain access is to hope the administrator unbans the IP or to find a way to bypass the ban.
How to Bypass IP Ban
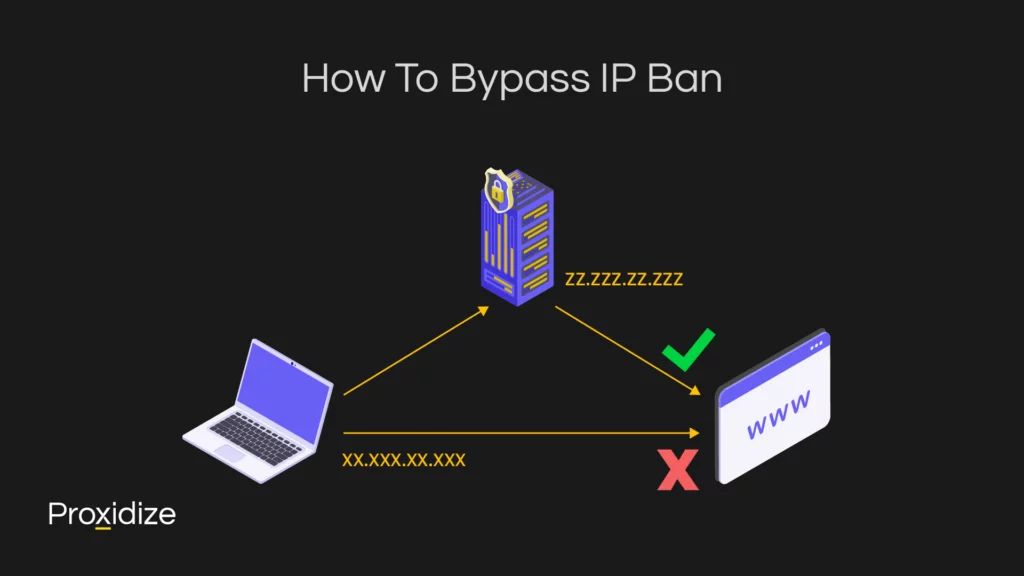
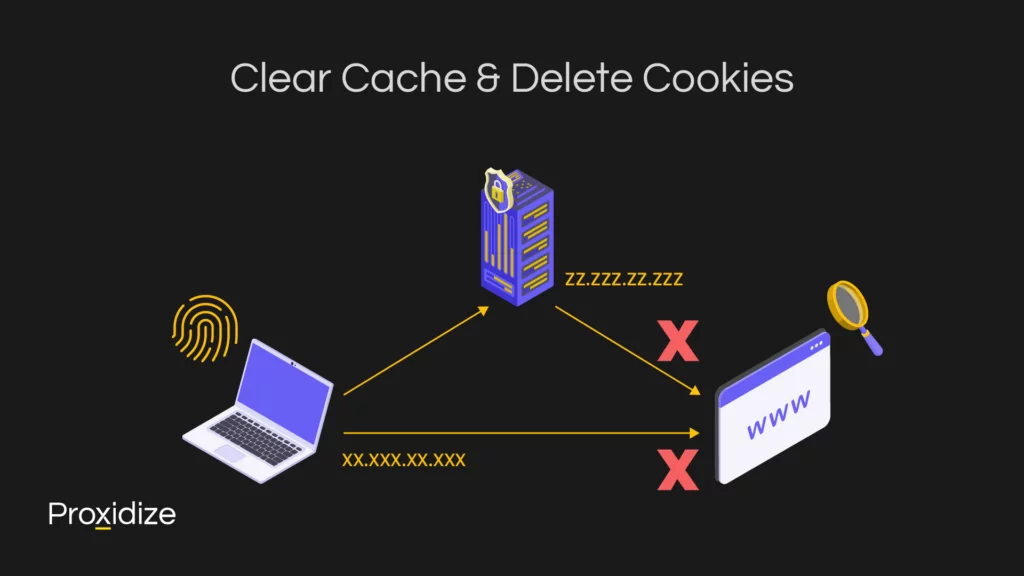
If you’ve been banned there are a number of steps you can take to try and bypass it. The most straightforward method is to use a proxy or VPN to get a new IP. Some websites will go a step further than just banning your IP, however. These sites will use cookies and browser fingerprints to track you separately from your IP. In that case, changing your IP alone isn’t enough because you’re still identifiable and will be banned again.
Use a Proxy Server
Using a proxy server is straightforward: Purchase one, configure your computer or phone to use it in your system settings, or use a browser extension to limit your proxy use to just your browser. There are many proxy types available including residential proxies, datacenter proxies, and mobile proxies. We have written articles detailing each type along with their individual benefits and disadvantages.
High-quality scraping and automation starts with high-quality mobile proxies
For Windows
- Go to the Settings application and search for “Network and Internet”.
- Click on the “Proxy” option. Once there, click on “Set Up Proxy Server”.
- Once there, a prompt will appear asking for the “Proxy IP Address” and the “Port”. This information will be found on the proxy provider’s software. Simply copy and paste the information and click “Save”.
For macOS
- Open up the “System Preferences”.
- Select the “Network” option.
- Select the type of network (either Ethernet or Wi-Fi).
- Click on “Advanced” and select the “Proxy” tab.
- Choose the proxy type (HTTP, SOCKS, etc.)
- Enter the “Proxy IP Address” and the “Port”.
- Click “OK”.
For iPhone
- Go to the “Settings” application and click on “Wi-Fi”.
- Select the Wi-Fi that is connected and scroll down to the bottom where the “Configure Proxy” option is.
- Select “Manual” and enter the “Proxy IP Address” and the “Port”.
For Android
- Open the “Settings” application and select the “Wi-Fi” option.
- Long press on the Wi-Fi that is being used and press on “Modify Network” and then “Advanced Options”.
- Press on Manual and enter the “Proxy IP Address” and “Port”.
- Press “Save”.
For Browsers
There are many different browser extensions that let you use proxies in your browser.
The example we’ll use is FoxyProxy. To use it:
- Go to the Chrome Web Store
- Search for FoxyProxy
- Install the extension
- Open the FoxyProxy settings
- Navigate to the Proxy tab
- Click Add
- Provide the proxy hostname (IP), port, username and password, and give it a name
- Turn on your proxy
By using a proxy, you use the server’s IP and geolocation to browse the internet. A functional proxy is cheap and only costs a few dollars. You shouldn’t use a free proxy, as they’re probably banned and risky. You could make your own proxy instead!
Use a VPN
A VPN is another convenient way to bypass an IP ban. Like free proxies, you shouldn’t use a free VPN either, because many of them are malicious. However, some VPN services have safe freemium options.
VPNs bypass an IP ban by giving a user a new IP address that comes from a server located in a warehouse. The IPs can either come from a different country or from the user’s host country if the provider has servers there.
Using a VPN is simple: Subscribe, download the program, connect to a server, and wait for it to connect.
Clear Cache & Delete Cookies
Clearing your cache and deleting your cookies can help bypass an IP ban by removing secondary identifiers if just using a proxy or VPN isn’t enough.
- First, open up the browser that had the IP ban implemented and open the browser settings or preferences menu. This varies depending on the browser in question.
- Once in the settings, find the option to clear the browsing data or cache. Ensure everything has been wiped clean.
- Next up, find the option to clear all cookies. Delete the files and remove them from the trash.
- After all that is done, restart the browser to make sure all the changes have been successful. To make sure everything has been done correctly, visit the website that informed the user of the IP ban. If all is done correctly, the user should be able to browse the website freely.
Use a Different Browser or Device
Using a different browser lets you wipe the slate clean with a new set of cookies, and gives you a different user-agent string. Together with a new IP, this should be enough to make you look like a different person visiting the website.
Antidetect Browsers
A radical but effective option is to use an antidetect browser, which lets you customize every aspect of the user-agent string and lets you block many of the hardware identifiers used in browser fingerprinting. When paired with a proxy, you can create a completely custom profile to browse the web with.
How do Websites Implement an IP Ban?
An IP ban denies requests from blocked IPs. Each site maintains a blacklist of IPs and may use third-party blacklists as well. Your IP is sent to the website as part of the network protocol. If the incoming IP matches a banned IP it’s rejected. If banned, you may see a 403 error.
With tools like server logs, cookies, analytics, and an algorithm to check the terms of service, many websites have tools set in place to catch anyone who would cause a threat to their website’s performance. Once it flags a security risk, administrators review the violation and if they deem it to be dangerous, they implement an IP ban by placing it on the blacklist, thus maintaining the website’s security.
The ban can either be temporary or permanent, lasting anywhere from a few hours to a few days, depending on the severity of the perceived offense. If the IP address has been temporarily banned numerous times, a permanent ban will take effect.
Many different services cater to websites, assessing visitors’ fraud risk and IP score, flagging potential bad actors.
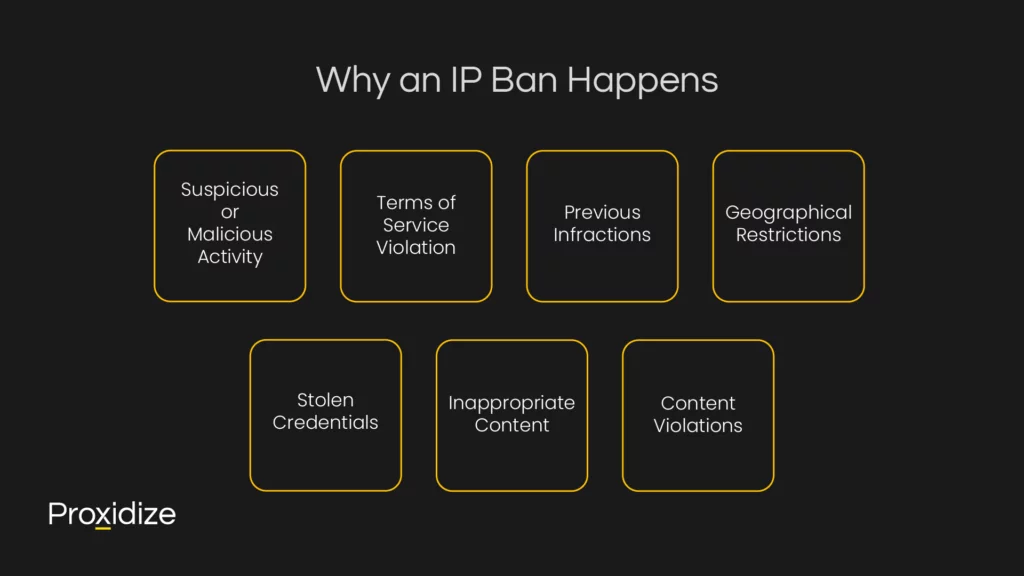
Why an IP Ban Happens
There are many reasons as to why an IP ban might take place. We had briefly mentioned a few of them above but this section will cover those in more detail while covering a majority of the other reasons why a ban will happen.
Suspicious or Malicious Activity: If an IP address is caught attempting to hack the website or perform excessive scraping or spam the website, then a ban will take place in order to protect the website from overloading or timing out for other users.
Terms of Service Violation: Every website offers terms of service which is a list of rules users must abide by if they wish to use the website. For communities or forums, most of the rules would be spamming or selling a product or bullying. If a user violates these rules, it would result in a ban. Some of these terms include the use of bots to create multiple accounts or purchase items in bulk such as when using a sneaker bot or a ticketing bot for scalping purposes.
Previous Infractions: If the IP address was banned temporarily, further infractions would cause a permanent ban.
- Geographical Restrictions: Occasionally, a website might be banned simply because of its location. This could be due to a legal issue or licensing issue..
- Stolen Credentials: Using login information from hacked or leaked accounts could lead to an outright ban and could potentially lead to legal action. Websites will notice if a hacked account has been accessed from a different IP address and would leap to ban that address as well in fear of the account committing the same nefarious activities.
- Inappropriate Content: Sharing content that goes against the terms and conditions of a website would also lead to an outright ban. This varies depending on the website but most sites would disallow hateful, threatening, or explicit content as a way to protect their users from seeing such content.
- Content Violations: Most websites, including social media sites, frown upon uploading copyrighted content such as movies, songs, or other various forms of media. If the IP is flagged as one common with pirating content or uploading pirated content, the user’s IP address will be banned.
How to Check if Your IP Has Been Banned
If you aren’t sure you have been IP banned and rule out external factors like the website being down for maintenance or the website having been shut down, there are ways to figure that out.
Getting blocked upon entering the site would be the first telltale sign of knowing an IP ban took place. Similarly, entering the website and seeing a message along the lines of “Access Denied” would be an indicator as well. Content and layouts refusing to load properly despite having a strong or fast connection would be another indicator.
If none of these methods provide a clear answer, you could try other networks such as a mobile hotspot or a public Wi-Fi to confirm. If you can access the website without any problems through those methods, the IP you normally connect with is most likely blocked. Tools like What Is My IP Address can tell you whether your IP has been flagged or put on a blacklist.
Pinging the website in the command prompt would be another indicator if the IP is banned. If the website returns a 403 error or a 429 error, chances are that it is banned. This can be checked when inspecting the browser console by clicking the F12 command.
Conclusion
An IP ban happens when you break a website’s terms of service or interact with a website in a way that is considered suspicious, malicious, or dangerous. While frustrating, especially in the case of false positives, you can take steps to bypass an IP ban:
- Change networks
- Use a proxy or VPN
- Clear browser cache & cookies
- Use a different browser or device
By following these steps you can regain access to the website. It’s important to avoid the behavior that earned you the ban in the first place, though. In the case of automation, it’s important to check the terms of service and the website’s robot.txt page.
Frequently Asked Questions
What if the IP ban is still in effect despite trying all these options?
If you’re using an app or platform (a program you’ve downloaded) and you still find yourself banned after taking all these steps, you may be banned based on your MAC address. A MAC address is assigned to the network interface card which is used to identify and communicate with other devices in the local network. Below, we have provided instructions to follow in case the MAC address has been banned on either a Windows device or a macOS device.
Windows
Go to Device Manager and open “Network Adapters”. From there you can manually change your MAC address via the “Advanced” tab in “Properties”. Once you’ve done this, disable then reenable the network adapter to apply the changes.
macOS
Open the terminal in “Applications” under “Utilities”. Enter “ifconfig” and locate the current MAC address. Look for the network adapter. From here you can use the command “sudo ifconfig <interface> ether <New MAC address>”. Now you can turn your WiFi connection on and off again and it should work. If it doesn’t, restart your device.
If none of those methods have worked out, users could contact their ISP to give them a brand new IP address. However, it is best to leave this as a last resort option as the other steps in this guide should work.
How to avoid IP bans from happening in the first place?
Adhere to a website’s terms of service, don’t send excessive requests, and use your judgement. Using a proxy or VPN can give you an expendable IP without risking your personal IP if you’re not sure. Look up online what the limits of the specific website you’re visiting are.
Can an IP ban be lifted?
One option to reverse a permanent ban is to appeal it by contacting a website’s administrator. Depending on the website this is unlikely but possible, if the ban was unjustified.
