An essential part of web development and data extraction is parsing HTML with Python, amongst many other coding languages. One tool that can assist with this is PyQuery. It is a popular choice for parsing HTML as it simplifies the process with its jQuery-like syntax which makes it more accessible. When compared to other powerful libraries, PyQuery offers a unique blend of simplicity and functionality.
This guide to PyQuery will explore parsing HTML with Python. From basic setup and element selection to more advanced features such as DOM manipulation, you will learn how to navigate and modify HTML documents with ease.
Introduction to PyQuery
PyQuery is a Python library that is designed to make working with HTML documents easier. It allows you to use familiar CSS syntax to select, navigate from one element to another, and manipulate HTML elements. This makes it an excellent choice for developers who are used to the jQuery library in Javascript and want a similar experience in Python.
Comparison With Other HTML Parsing Libraries
There are several popular libraries to choose from that can assist with parsing HTML in Python. Two of these libraries include Beautiful Soup and lxml.
Beautiful Soup provides a simple API for navigating and searching the parse document tree. Lxml is fast and efficient and leverages the power of the libxml2 and libxslt libraries. It offers both an ElementTree API and a BeautifulSoup-like API for parsing and manipulating HTML. However, PyQuery stands out by combining the ease of use of BeautifulSoup with the speed of lxml.
Key Features and Advantages of using PyQuery
PyQuery offers many features and advantages that make it a powerful tool for HTML parsing including:
- CSS Selectors: PyQuery’s selectors allow you to quickly and easily locate elements within an HTML document.
- Ease of Use: The syntax and API are straightforward and intuitive.
- Integration with lxml: By leveraging lxml, PyQuery provides fast and efficient parsing and manipulation of HTML documents.
- DOM Traversal and Manipulation: PyQuery allows for comprehensive Document Object Model (DOM) traversal and manipulation, including adding, removing, and modifying elements.
- Compatibility with jQuery Code: If you have existing jQuery code, you can often translate it directly to PyQuery with minimal changes, facilitating a smooth transition between JavaScript and Python.
Setting Up PyQuery
For starters, you will need to install PyQuery. This can be done easily using pip. Open your terminal or command prompt and run the following command:
pip install pyqueryThis will download and install PyQuery along with its dependencies, including lxml, which is essential for parsing HTML documents efficiently.
Basic Setup
With PyQuery installed, you can now start using it in your Python scripts. You will find a basic setup guide to help you get started.
- Import PyQuery
Begin by importing PyQuery within your Python script. This can be done using this command:
from pyquery import Pyquery as pq- Loading HTML content
PyQuery can load HTML content from a variety of sources including strings and files. If you have HTML content as a string, you can pass it directly to PyQuery using this:
html = '<html><body><h1>Hello, World!</h1></body></html>'
d = pq(html)If your HTML content is in a file however, you can read the file and then pass the content to PyQuery using this:
with open('example.html', 'r') as f:
    html = f.read()
d = pq(html)- Loading from a URL
PyQuery can load HTML content directly from a URL. This can be useful for web scraping tasks where you need to fetch and parse content from a web page.
d = pq(url='http://example.com')- Basic Operations
After loading the HTML content, you can start performing basic operations including selecting elements and extracting text. To find elements, use CSS selectors within the HTML document. For example, to select an H1 tag and print its text content, use this code:
print(d('h1').text())To extract and manipulate attributes, you could use a similar looking code. For example, to extract a class attribute, use this:
print(d('h1').attr('class'))By following these steps, you will have PyQuery set up and ready to parse and manipulate HTML content. This basic setup provides a foundation for more advanced methods, giving you the ability to take full advantage of PyQuery’s features.
Selecting Multiple Elements
While the section above covered how to select singular elements, let us explore how you would go about selecting multiple elements at a time to help expand your projects and lessen the need to extract each element one by one. In this section, we will cover how you can select all elements of a type, including selecting elements by class and attribute, as well as how to combine selectors and select nested elements to get the most out of your code.
- Selecting All Elements of One Type
You can select all the elements of a specific type by specifying the tag name. This code will give an example of how to do this by selecting all the <p> tags.
from pyquery import PyQuery as pq

html = '''
<html>
    <body>
        <p>Paragraph 1</p>
        <p>Paragraph 2</p>
        <p>Paragraph 3</p>
    </body>
</html>
'''
d = pq(html)
paragraphs = d('p')
for p in paragraphs:
    print(pq(p).text())
# Outputs:
# Paragraph 1
# Paragraph 2
# Paragraph 3- Selecting Elements by Class
You can select elements that share common class attributes. This can be done as such:
html = '''
<html>
    <body>
        <div class="content">Content 1</div>
        <div class="content">Content 2</div>
        <div class="content">Content 3</div>
    </body>
</html>
'''
d = pq(html)
contents = d('.content')
for content in contents:
    print(pq(content).text())
# Outputs:
# Content 1
# Content 2
# Content 3 - Selecting Elements by Attribute
You could select elements based on attribute values. For instance, selecting all <a> tags with a specific href attribute. This is done as such:
html = '''
<html>
    <body>
        <a href="link1.html">Link 1</a>
        <a href="link2.html">Link 2</a>
        <a href="link3.html">Link 3</a>
    </body>
</html>
'''
d = pq(html)
links = d('a[href]')
for link in links:
    print(pq(link).attr('href'))
# Outputs:
# link1.html
# link2.html
# link3.html- Combining Selectors
You could combine multiple selectors which help narrow down your selection. As an example, selecting all div elements with a specific class and attribute would look something like this:
html = '''
<html>
    <body>
        <div class="content" data-id="1">Content 1</div>
        <div class="content" data-id="2">Content 2</div>
        <div class="content" data-id="3">Content 3</div>
    </body>
</html>
'''
d = pq(html)
specific_contents = d('div.content[data-id]')
for content in specific_contents:
    print(pq(content).text())
# Outputs:
# Content 1
# Content 2
# Content 3 - Selecting Nested Elements
PyQuery allows you to select nested elements by chaining selectors together. For a code example, we will be selecting all span elements within div elements.
html = '''
<html>
    <body>
        <div>
            <span>Span 1</span>
        </div>
        <div>
            <span>Span 2</span>
        </div>
        <div>
            <span>Span 3</span>
        </div>
    </body>
</html>
'''
d = pq(html)
spans = d('div span')
for span in spans:
    print(pq(span).text())
# Outputs:
# Span 1
# Span 2
# Span 3By using all these techniques, you will be able to effectively select and work with multiple elements to parse HTML with Python. These methods provide both flexibility and precision in navigating and manipulating document structure.
Advanced PyQuery Techniques
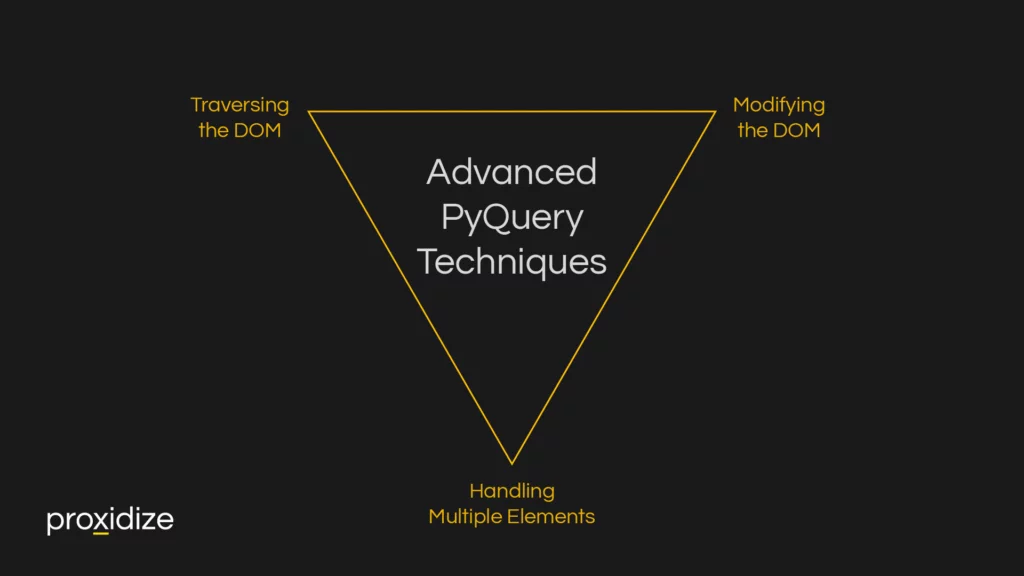
With the basic out of the way, let us explore some more advanced techniques such as traversing and modifying the DOM as well as how to handle multiple elements.
Traversing the DOM
Traversing the DOM refers to navigating through the HTML document structure. This involves moving from one element to another. PyQuery offers many methods for DOM traversal that allow you to access parent, child, and sibling elements easily.
- Parent Elements: use the `.parent()` method
from pyquery import PyQuery as pq

html = '''
<html>
    <body>
        <div>
            <p>Paragraph inside div</p>
        </div>
    </body>
</html>
'''
d = pq(html)
parent = d('p').parent()
print(parent) # Outputs: <div>...</div>- Child Element: use the `.children()` method
children = d('div').children()
for child in children:
    print(pq(child).text())
# Outputs:
# Paragraph inside div- Sibling Element: use the `.siblings()` method
html = '''
<html>
    <body>
        <div>First div</div>
        <div>Second div</div>
        <div>Third div</div>
    </body>
</html>
'''
d = pq(html)
first_div = d('div').eq(0)
siblings = first_div.siblings()
for sibling in siblings:
    print(pq(sibling).text())
# Outputs:
# Second div
# Third div- Next and Previous Elements: to select the next and previous sibling element use the `.next()` and `.prev()` methods
next_element = d('div:first').next()
print(next_element.text())  # Outputs: Second div

previous_element = d('div:last').prev()
print(previous_element.text()) # Outputs: Second divModifying the DOM
PyQuery gives you the ability to modify the DOM by adding, removing, or changing elements and their attributes as well as changing text and HTML content.
- Adding Elements: use the `.append()`, `.prepend()`, `.after()`, or `.before()` methods
d('body').append('<p>New paragraph at the end</p>')
d('body').prepend('<p>New paragraph at the beginning</p>')
d('div:first').after('<p>New paragraph after first div</p>')
d('div:last').before('<p>New paragraph before last div</p>')- Removing Elements: use the `.remove()` method
d('div').remove()- Changing Attributes: use the `.attr()` method
d('div:first').attr('class', 'new-class')- Changing Text Content: use the `.text()` method
d('div:first').text('Updated text content')- Changing HTML Content: use the `.html()` method
d('div:first').html('<span>New HTML content</span>')Handling Multiple Elements
PyQuery is such a powerful tool that you could work with multiple elements at once. You can perform operations on collections of elements efficiently. We previously discussed how you can select multiple elements. This section will cover how you could iterate over elements, apply changes to multiple elements, filter elements, and map over elements.
- Iterating over Elements: use the `.each()` method to iterate over a set
d('div').each(lambda i, e: print(pq(e).text()))
# Outputs:
# First div
# Second div
# Third div- Applying Changes to Multiple Elements:
d('div').addClass('highlight')
# Adds the 'highlight' class to all <div> elements- Filtering Elements: use the `.filter()` method to refine your selection
filtered = d('div').filter(lambda i, this: pq(this).text() == 'Second div')
print(filtered) # Outputs: <div>Second div</div>- Mapping Over Elements: use the `.map()` method to transform a set of elements:
texts = d('div').map(lambda i, this: pq(this).text().upper())
for text in texts:
    print(text)
# Outputs:
# FIRST DIV
# SECOND DIV
# THIRD DIV
Using Proxies with PyQuery
An integral part of web scraping and data extraction is to use a proxy. Proxies can help by bypassing geographical restrictions, avoiding IP blocks, and enhancing access to web content. By using PyQuery with a proxy server, you can gather data from various sources while minimizing the risk of being blocked by websites due to an increase in requests. You have a choice between using a residential proxy, a datacenter, or a mobile proxy, however, using a mobile proxy will provide the lowest chance of being blocked.
Setting Up a Proxy: You can configure your HTTP requests to use a proxy by passing proxy settings to the requests library. This can be done by inserting this code block:
import requests
from pyquery import PyQuery as pq

proxy = {
    'http': 'http://your.proxy.server:port',
    'https': 'http://your.proxy.server:port'
}

response = requests.get('http://example.com', proxies=proxy)
d = pq(response.text)Rotating Proxies: To further avoid being blocked, you can rotate proxies using a list of proxy servers. Most proxy providers offer the ability to create a proxy pool that would rotate your IP, hiding your parsing tasks from detection. You can set up rotating proxies using this code block:
import random
import requests
from pyquery import PyQuery as pq

proxies = [
    'http://proxy1.server:port',
    'http://proxy2.server:port',
    'http://proxy3.server:port'
]

proxy = {'http': random.choice(proxies), 'https': random.choice(proxies)}
response = requests.get('http://example.com', proxies=proxy)
d = pq(response.text)Conclusion
Throughout this guide to PyQuery, we explored parsing HTML with Python, including a simple setup with some code examples to show how this valuable tool can assist and simplify your parsing tasks. We covered some more advanced techniques such as manipulating the DOM and handling multiple elements. We also reminded you how valuable using a proxy is when performing these tasks as the risk of getting detected can cause your IP to be blocked from accessing the site.
After you have parsed your links, if you are interested in scraping the information, we have written a few articles detailing how to start web scraping using BeautifulSoup and a guide on web scraping with Selenium in Python. With the knowledge you gained from this article on how to parse HTML with Python mixed with the information on BeautifulSoup or Selenium scraping, you will be able to automate your data collection tasks and save countless hours.
